
Monday, October 10, 2011


Monday, September 26, 2011
COMPUTER EROR; HANG; VIRUS; CORUPT; ETC
YOUR COMPUTER TROUBLE:
 |
| AUTO UPDATE |
 |
| BLUE SCREEN |
 |
| SYSTEM SLOW |
 |
| SEND ERROR REPORT |
 |
| KEYBOARD ERROR |
 |
| INFECTION VIRUS |
 |
| SOLUTION FREE ALL TROUBLE >>>SERVICE ONLINE FREE >>> SMS 081331067345/COMMENTS/SHOUTMIX/SHARE |
Monday, April 25, 2011
Resetter Epson L200
Resetter Epson L200

How to Resetter Epson L200 :
Download Resetter Epson L200 (ekohasan password)
Resetter Epson L200 :
1. Turn On Espon L200
2. Run Resetter L200 >>> double click file "AdjProg cracked.exe"
3. Click "accept" >> "Particular Adjusment Mode" >> "Waste ink pad Counter reset" >> "Check" >> check mark "main pad counter, FL box counter, Ink tube Counter", so click "Initialization" >> "Finish".


4. Turn off.
5. Turn On
Sunday, April 10, 2011
Resetter Epson L100
Resetter Epson L100

How to Reset Epson L100
Resetter epson L100 download here :
http://www.ziddu.com/download/14080411/resetterL100.7z.html (ekohasan password)
Resetter Epson L100 :
1. Turn On Espon L100
2. Run Resetter L100 >>> double click file "AdjProg cracked.exe"
3. Click "accept" >> "Particular Adjusment Mode" >> "Waste ink pad Counter reset" >> "Check" >> check mark "main pad counter, FL box counter, Ink tube Counter", so click "Initialization" >> "Finish".
4. Turn off.
5. Turn On

Is Your Printer Ready for Windows 7?
With Windows 7 officially available, complaints about lack of support for printers likely won't be far behind. But the good news is that you have a much better chance of moving your printer to Windows 7 without serious problems than you had going from XP to Vista. Granted, that's not a particularly high bar to clear, but after all the problems with printers and Vista, both Microsoft and most printer manufacturers have made an effort to make the move to Windows 7 easier. Judging by my tests, they seem to have succeeded. Unfortunately, that doesn't mean there isn't anything left to worry about.
It's important to understand that printers can have different levels of support in Windows 7. For a single-function printer, the first, and most minimal, level is the ability to print. Beyond that, a Windows 7 driver may or may not support such features as duplexing (printing on both sides of a page) or multiple paper trays.
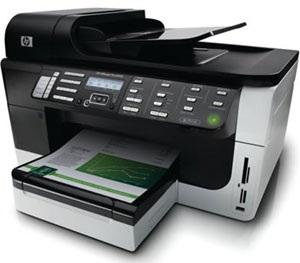
For a multifunction printer (MFP)—also known as an all-in-one, or AIO—support may or may not cover other functions besides printing. HP, for example, says that for its AIOs, the drivers included on the Windows 7 disc and on the Windows Update site allow printing and scanning, but the scan support for network printers in many cases is limited to scanning over a USB connection. Also missing from the Windows 7 disc and Windows Update are things like fax drivers for those HP AIOs that include a fax capability, and bundled software that adds features like optical character recognition (OCR) to let you scan a document and turn the image into editable text.
Missing Pieces and Where to Find Them
Fortunately, you're not limited to the built-in support on the Windows 7 disc and Windows Update. HP also provides (or, depending on the printer, is planning to provide) Windows 7 updates on its own site for many of its printers, with full support—including such things as bundled software with OCR modules. What's true for HP isn't necessarily true for all companies. Microsoft says that the level of support available on the Windows 7 installation disc and on the Windows Update site differs from one manufacturer to another, and even from one model to the next for any given manufacturer.
What all this translates to is that if you want to know if your printer is ready for Windows 7, you have to not only ask if your printer will work with Windows 7 before you make the change, you should also try to find out whether it's fully supported and, if not, what you have to give up. It also helps to know whether you have to download an update to get the most support possible and, if so, from where.
You may not be able to find this additional information, but it's worth making the effort before committing to Windows 7. If you can't find a definitive answer, at least consider whether you're willing to give up some printer features.
Windows 7 Compatibility Center
A good place to start your research is with the Microsoft Windows 7 Compatibility Center. Under the heading Check the compatibility status of your software and devices, you can choose Hardware from the drop-down list, and then enter your printer model. This will either turn up a list of possible matches or show a single exact match. If your printer turns up in the search results, it will most likely have a green checkmark labeled 32-bit next to the name, with the notations Compatible and Learn more. Other possibilities include a big red X paired with the words Not compatible, and a lowercase i in a blue circle, with the words Information coming soon.
Some of the printers labeled as compatible will also include a Compatible with Windows 7 logo, which means they've passed Microsoft's compatibility tests. This doesn't necessarily mean that the driver supports all of the printer's features, but it does mean that the printer has passed Microsoft's tests for reliability and stability. In other words, it won't make Windows 7 crash.
Whatever the list says about your printer, click on the entry to see a page with more details. On the detail page, you can click on the 32-bit or 64-bit tab, depending on which version of Windows 7 that you plan to run. (If you not sure what the difference is, you can also move your mouse cursor over the text What's 64-bit? and click on Learn more in the description that pops up.)
Interpreting Compatibility
In most cases you'll find some additional information on the details page. However, there's one detail you should take with a large grain of salt. For compatible printers, you'll see the green check with the Compatible label again, along with a note saying either No action required or Free download required. If it says the former, ignore it.
The problem is that No action required doesn't necessarily mean that you don't have to take any action to get full support for your printer. It only means that the Windows 7 disc, Windows Update, or both include drivers with minimal support for printing and, for AIOs, scanning. As I've already pointed out, these drivers may not support all of the printer's features. You may still have to go to the manufacturer's Web site to download full support, or at least additional support, if it's available.
The detail page for any given printer typically includes a link to the manufacturer's Web site. Depending on the manufacturer, you may or may not find additional information on the site, but you should follow the link to find out. Whatever you do, if the detail page says No action required, don't take it at face value.
Keep in mind too that the information in the Compatibility Center is not definitive. Microsoft points out that it updates the information every two weeks. The detail pages even ask users to vote Yes or No on whether the information is accurate, and other pages ask users to let Microsoft know if something's missing. One of the printers I installed for my tests, for example, isn't on the list at all, but it worked without problems. And it took me only a few minutes to find three HP printers that are marked as not compatible, even though HP offers Windows 7 drivers on its Web site.
The point here is that if your printer earns a green check in the Compatibility Center, it's probably safe to assume it will work, but not necessarily with all the features you're used to. If it isn't listed, however, or is marked as not compatible, don't stop there, because it may work anyway. Ultimately, you may have to try installing it yourself to find out. For details on how to do that, take a look at 7 Windows 7 Printer Installation Tips.
http://www.pcmag.com/article2/0,2817,2356157,00.asp
Thursday, April 7, 2011
Fixing Error Code 241 Paper Jam on Lexmark printers

Solution 1:
- Take tray out.
- Lift up so have access to bottom of printer.
- The 2 rubber rollers in the middle can be taken off
- Flip them inside out and put them back on and put tray back in.
Solution 2:
- Take out paper tray 1.
- Remove any jammed sheets of paper you find there.
- Once you have done this, reinstall the paper tray and try printing again.
- If the printer jams again with a 241 Paper Jam error message, look to see if it has tried to feed a sheet of paper out of the tray.
- If paper is not leaving the tray and no paper appears to be jammed anywhere in the printer, remove paper tray 1 once again. Make sure the paper is loaded correctly in the tray. With the tray removed, you can also check the feed/pick rollers. Do the following:
- Look into the printer where the tray goes.
- Look for two tan-colored rubber rollers (circled in green in the picture below). These are the rollers that grab and feed the paper up into the printer.

- Clean off the rollers with a dry cloth and try printing again.
- If the printer still will not pull any paper, your feed rollers may be worn. As a temporary fix, you can try flipping the rubber feed rollers inside out. Remove paper tray 1 again and carefully remove the rubber tire off each of the roller wheels. Then flip the rubber tire inside out and put it back on the wheel.
- If either step 3 or 4 fixes the problem, your feed rollers are worn and will eventually need to be replaced. However, you should be able to continue to use the printer temporarily.
- If the paper still does not feed at all, the feed motor to tray 1 may not be feeding the paper. In this case, the printer will require service.
- If paper is feeding out of the tray but getting jammed, you may be able to pinpoint the source of the problem by taking a close look at where the leading edge of the paper is stopped.
- If the paper is getting jammed right at tray 1, a small piece of paper may be stuck in one of the rollers at the front of the printer. Do the following:
- Remove paper tray 1.
- Look into the printer where the paper tray goes. Look upwards into the very front of that area. You should see a slot or guide where the paper will go once it is fed out of the tray. Towards the left-hand side, there is a set of feed rollers. A small piece of paper can get wrapped around one of the rollers here.
- If you see a small piece of paper stuck in one of these rollers, try to remove it.
- If you cannot reach it or it cannot be removed, the assistance of a service technician will probably be needed.
Note: To complete steps 1-3 above, it may help to lay the printer on its side. If you do this, please use caution when lifting the printer. Remove the toner cartridge and the paper tray before setting the printer on its side. Also make sure the printer is powered off and unplug any and all cords, especially the power cord, going into the printer. Refer to the photos below for guidance on where to look into the printer for the feed rollers. The rollers are located in the area of the printer highlighted by the yellow circles.

- If the paper is getting past the front of the printer and jamming elsewhere with a 241 Paper Jam error, do the following:
- Look for any obstructions at the leading edge of where the paper is jamming.
- If you are not able to find (and remove) any obstruction, the printer will probably need service to isolate the problem and replace the failing component.
- Another way you can find out if your printer will require service for this issue is to obtain the secondary codes for the paper jam error. To do this:
- As soon as you receive the 241 Paper Jam error message, press and hold the Return button.
- While holding down the Return button, press the Select button. Two lines of numbers will appear on the printer screen. These are the secondary codes.
- If the top line of the secondary code is 8E XX 06 X1 (where X can be any letter or number), the problem could be with the pick motor for tray 1. This will probably result in the printer needing service.
- If you continue to receive the jamming error after checking all of these possibilities, the printer may require service.
Wednesday, April 6, 2011
How to solve error C000 on Canon Pixma MX870

How to solve error C000 on Canon Pixma MX870
Solution 1:
- Switch off the printer
- Disconnect the power cable
- Open door:

- Remove the orange protective tape (A) and remove the white polystyrene (protective equipment) (B).

- Verify in the printer there is no protective equipment:
- Close the door.
- Connect the cable and switch on.

Solution 2 :
- Check for any foreign body in the printer: piece of paper, paper clip...
- Check for any paper jams.
Solution 3:
- This error code C000 could be made by an empty cartridge: check for this.
Monday, April 4, 2011
Hi-Speed 7 Port USB 2.0 Hub +Power AC Adapter for PC
 Product Description
This 7 port USB hub should be the easiest and fastest way to connect all your USB devices to PC, laptops. 7 high-speed ports can connect to an almost limitless number of USB devices including modems, scanners, printers, PC cameras, digital cameras, keyboards.Specially designed for space-saving function and multi-connection convenience. Each port handles up to 480Mbps; these devices are fully hot-swappable and daisy-chainable up to 127 devices. The LEDs help color-code your USB devices and ports. Plug this hub into just one of your computers USB ports and you'll add 7 extra USB ports to your computer. This USB 2.0 7-port hub gives you more flexibility of connections. It comes with an AC power adapter so you can run devices like external drives, printers.
Product Details
* Brand: HDE
Features
* USB 2.0 and USB 1.1 compliant and USB-IF certified. Supported data speed: 1.5/12/480 Mbps. One upstr
* 8 luminescent LED lights. USB Powered. Over-current detection and protection for each downstream por
* Hot-swappable plug & play connection. Daisy-chain connection of up to 127 devices. Dimensions: 100 x
* Work with Windows 98/NT/2000/ME/XP. Package content: 1 x hi-speed 7-port hub with led lights, 1 x US
Wednesday, March 23, 2011
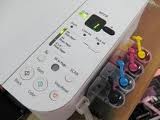
RESETTER EPSON T13
How to Reset Epson T13

- Note : Date not change
- Double click "AdjProg.exe".
- Follow the following picture :


- Turn off
- Turn On
Monday, February 28, 2011
How to Reset ink counter on Canon MP198

A. Entering into service mode
- Turn off the printer off is the printer power on. And remove the printer USB cable from your computer..
- While the printer is OFF, press and hold the Start/Stop button on the some other canon printers model press Resume/Cancel button.
- While still holding Start/Stop button or Resume/Cancel button, press and hold the POWER button.
- When the POWER LED (green light) lit, release the Start/Stop or resume/cancel button (still holding the POWER button).
- Still holding the power button, Press the Start/Stop button or resume/cancel button TWICE then Release the POWER button. Wait until LCD printer to display 0 (zero) number
- After the display is 0, attach the printer UDB cable to your computer, its will detected new device installed (its normal), now go to resetting steps
- Run “service_tool 1050.exe”. you can download the service tool software from this link: ServiceTool_1050.zip
- Confirm detected USB-port numbers on USB port column.
- Click “Main button” on Clear ink counter section. Make sure there are papers in the paper feed because the printer will print after the process is complete.
- Click “platen button” on the “Clear ink counter” section. The printer will print again.
- Turn off the printer and then turn the printer on.
This work too with: MP258, MP276, MP496, MP558, MP568, and MP648
Friday, February 18, 2011
Reset waste ink Canon Pixma MP210
How to reset waste ink pad on Canon Pixma MP210

Error 5b00 means the waste ink counter is full, you need to reset it.
Solution:
Step 1: Download PCM Service tool.
Step 2: Enter in service mode in order to used the re setter:
- Turn off the printer without pulling the power cords.
- Hold down Resume button and press Power button
- Keep holding down Power button and let Resume button go
- Then Press Resume button 5 times then let both buttons go
- The Alternate Blinking error is gone, the printer is in Service Mode state
- Extract the PCM servive tool resetter and then double click "servicetool.exe"
- Click Reload Button and you will get a new USB port.
- Load some papers in your printer and press the "Main" Button, wait until it shows "error 001" then press OK.
- Then press "EEPROM" button and the printer will print some text, after that click OK
- Then power off the printer (sometimes you have to press twice the power button to turn off) and turn on again.
Tuesday, February 15, 2011
Error 0x61011beb on HP Officejet and Photosmart printers
Solution 1:
- With the printer power on, disconnect the USB cable from the computer.
- Remove the ink cartridges
- Unplug the power cord. Wait for at least 1 minute. Plug the unit back in (press the power button if necessary)
- Wait for the "Insert Cartridges" message. Reinstall the cartridges
Close the product doors - If you receive a recalibration message, allow the printer to complete this task
- Reconnect the USB cable
- Try your print job again
Solution 2:
- Plug it directly into the wall, rather than into a UPS.
- Verify that the unit is switched on. Disconnect the USB/Ethernet cable from the All-in-One and also disconnect power cable from All-in-One and also from wall outlet.
- Wait 30 seconds.
- Plug in the power cable to All-in-One and also to wall outlet.
- Check for the functionality.
Solution 3:
- Unplug the power cable from printer when the printer is powered on and wait for 20 seconds.
- Then, press and hold # and 6 while plugging in the power cord.
- Continue holding until it displays Semi Full Reset message in the front panel of the All-in-One
Monday, February 14, 2011
How to reset waste ink pad on Brother DCP 770CW

How to reset waste ink pad on Brother DCP 770CW
Solution for "Error 46 Unable to Clean":
- Enter machine maintenance mode. FAX models with numerical keypads: Press the Menu/Set, *, 2, 8, 6 and 4 keys within two seconds. (if you fail to complete the correct key sequence within two seconds, press the Stop key to try again).
Other (non-FAX) models: Press the Menu/Set and Black Start keys. Next press the “up arrow” key four times to enter the maintenance mode). - Press the 8 then 0 keys in the initial stage of the maintenance mode to call up the machine’s log information list (function code 80).
- Press the Black Start key several times to scroll through the log information list to reach the purge counter. The purge counter is the 25th item in the list.
- Press the 2, 7, 8, and 3 keys in this order to reset the purge count to zero.
- Press the Stop/Exit key to return to the initial stage of the maintenance mode.
- Press the 9 key twice to return to the standby state.
Monday, February 7, 2011
EPSON T13
Why the Epson Stylus™ T13?
Epson Stylus™ T13 is your perfect and customised desktop printing partner.
Water, smudge and fade resistant prints with Epson DURABrite™ Ultra Ink
- Epson DURABrite™ Ultra Ink, an all-purpose ink for everyday printing, delivers vibrant prints that last. Superior printing quality is now possible with this revolutionary smudge and water resistant ink.

Save more with Epson INKdividual™ Cartridges
- Enjoy greater savings with Epson cost effective INKdivdual™ cartridges. You can now maximise usage of your ink cartridges when you replace only the empty cartridge.
Superior print speed for tight schedules
- With a print speed of up to 28 pages per minute, you cut down significantly on waiting time. Printing has never been this efficient and easy.
Unsurpassed print quality
- With a high resolution of 5760dpi, expect exceptionally high, photo-quality prints. In addition, it allows you to create and produce borderless photo prints for all your creative needs.
Achieve photo perfection with Epson Creativity Suite
- Create professional and impressive photos and presentations with Epson’s dynamic, user-friendly photo editing and enhancement software, Epson Creativity Suite. You can now achieve photo perfection with the following functions:
- Red Eye Correction
Eliminate red eye effect and create professional photos instantly with just a click of a button. - Epson PhotoEnhance
Deliver beautiful and natural photo prints by adjusting the skin tones, colour casts and exposure levels. - Epson Easy Photo Print
Achieve photo lab quality prints in just 3 steps with this easy to use software.
- Red Eye Correction
Reset Canon Pixma MP520

Solution for error code 5B00:
- Switch the printer OFF
- Press buttons 1 + 2 + 3 and 4 (simultaneously using four fingers). See picture bellow
- Keep pressing this four buttons for 10 seconds
- Release the On/Off button (number 4) (Keeping pressing the others)
- After a few seconds (when the printer go ON) you can release buttons 1, 2, 3

Saturday, February 5, 2011
Reset Counter Epson RX600, RX620 and RX630 | Free Resetter Indo
Reset Counter Epson RX600, RX620 and RX630
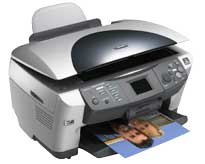
Resetting RX600, RX620 and RX630 using adjustment program and manual reset. Adjustment Program RX600, RX620 and RX630 work under win98, WinME, Win 2K and Windows XP. This adjustment does not require date setting.
Resetting Counter on Epson RX600, RX620 and RX630 Using this Adjustment Program
- Run the software and Set the adjustment setting and equal to the printer, Click Ok
- Click maintenante tab
- Check waste ink pad counter then click reset to reset the counter.
- Press all following buttons : Power, B&W, Color,
- Then, on demand (you'll see message on printer screen), turn off printer.


