Followers

Popular Posts

Monday, February 28, 2011

How to Reset ink counter on Canon MP198


A. Entering into service mode


  • Turn off the printer off is the printer power on. And remove the printer USB cable from your computer..
  • While the printer is OFF, press and hold the Start/Stop button on the some other canon printers model press Resume/Cancel button.
  • While still holding Start/Stop button or Resume/Cancel button, press and hold the POWER button.
  • When the POWER LED (green light) lit, release the Start/Stop or resume/cancel button (still holding the POWER button).
  • Still holding the power button,   Press the Start/Stop button or resume/cancel button TWICE then Release the POWER button. Wait until LCD printer to display 0 (zero) number
  • After the display is 0, attach the printer UDB cable to your computer, its will detected new device installed (its normal), now go to resetting steps
B. Resetting Ink counter on the Printer

  • Run “service_tool 1050.exe”. you can download the service tool software from this link: ServiceTool_1050.zip 
  • Confirm detected USB-port numbers on USB port column.
  • Click “Main button” on Clear ink counter section. Make sure there are papers in the paper feed because the printer will print after the process is complete.
  • Click “platen button” on the “Clear ink counter” section. The printer will print again.
  • Turn off the printer and then turn the printer on.


This work too with:  MP258, MP276, MP496, MP558, MP568, and MP648

Read More

Friday, February 18, 2011

Reset waste ink Canon Pixma MP210

How to reset waste ink pad on Canon Pixma MP210


Error 5b00 means the waste ink counter is full, you need to reset it.


Solution:


Step 1: Download PCM Service tool.


Step 2: Enter in service mode in order to used the re setter:

  • Turn off the printer without pulling the power cords.
  • Hold down Resume button and press Power button
  • Keep holding down Power button and let Resume button go
  • Then Press Resume button 5 times then let both buttons go
  • The Alternate Blinking error is gone, the printer is in Service Mode state
Step 3:

  • Extract the PCM servive tool resetter and then double click "servicetool.exe"
  • Click Reload Button and you will get a new USB port.
  • Load some papers in your printer and press the "Main" Button, wait until it shows "error 001" then press OK.
  • Then press "EEPROM" button and the printer will print some text, after that click OK
  • Then power off the printer (sometimes you have to press twice the power button to turn off) and turn on again.
Read More

Tuesday, February 15, 2011

Error 0x61011beb on HP Officejet and Photosmart printers


Solution 1:

  • With the printer power on, disconnect the USB cable from the computer.
  • Remove the ink cartridges
  • Unplug the power cord. Wait for at least 1 minute. Plug the unit back in (press the power button if necessary)
  • Wait for the "Insert Cartridges" message. Reinstall the cartridges

    Close the product doors
  • If you receive a recalibration message, allow the printer to complete this task
  • Reconnect the USB cable
  • Try your print job again


Solution 2:

  • Plug it directly into the wall, rather than into a UPS.
  • Verify that the unit is switched on. Disconnect the USB/Ethernet cable from the All-in-One and also disconnect power cable from All-in-One and also from wall outlet.
  • Wait 30 seconds.
  • Plug in the power cable to All-in-One and also to wall outlet.
  • Check for the functionality.


Solution 3:

  • Unplug the power cable from printer when the printer is powered on and wait for 20 seconds.
  • Then, press and hold # and 6 while plugging in the power cord.
  • Continue holding until it displays Semi Full Reset message in the front panel of the All-in-One


Read More

Monday, February 14, 2011

How to reset waste ink pad on Brother DCP 770CW


How to reset waste ink pad on Brother DCP 770CW

Solution for "Error 46 Unable to Clean":


  • Enter machine maintenance mode. FAX models with numerical keypads: Press the Menu/Set, *, 2, 8, 6 and 4 keys within two seconds. (if you fail to complete the correct key sequence within two seconds, press the Stop key to try again).

    Other (non-FAX) models: Press the Menu/Set and Black Start keys. Next press the “up arrow” key four times to enter the maintenance mode).

  • Press the 8 then 0 keys in the initial stage of the maintenance mode to call up the machine’s log information list (function code 80).

  • Press the Black Start key several times to scroll through the log information list to reach the purge counter. The purge counter is the 25th item in the list.

  • Press the 2, 7, 8, and 3 keys in this order to reset the purge count to zero.

  • Press the Stop/Exit key to return to the initial stage of the maintenance mode.

  • Press the 9 key twice to return to the standby state.

Read More

Monday, February 7, 2011

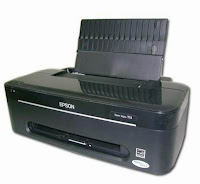
EPSON T13

Why the Epson Stylus™ T13?
Epson Stylus™ T13 is your perfect and customised desktop printing partner.


Water, smudge and fade resistant prints with Epson DURABrite™ Ultra Ink

  • Epson DURABrite™ Ultra Ink, an all-purpose ink for everyday printing, delivers vibrant prints that last. Superior printing quality is now possible with this revolutionary smudge and water resistant ink.


Save more with Epson INKdividual™ Cartridges

  • Enjoy greater savings with Epson cost effective INKdivdual™ cartridges. You can now maximise usage of your ink cartridges when you replace only the empty cartridge.


Superior print speed for tight schedules


  • With a print speed of up to 28 pages per minute, you cut down significantly on waiting time. Printing has never been this efficient and easy.


Unsurpassed print quality

  • With a high resolution of 5760dpi, expect exceptionally high, photo-quality prints. In addition, it allows you to create and produce borderless photo prints for all your creative needs.


Achieve photo perfection with Epson Creativity Suite

  • Create professional and impressive photos and presentations with Epson’s dynamic, user-friendly photo editing and enhancement software, Epson Creativity Suite. You can now achieve photo perfection with the following functions:
    • Red Eye Correction

      Eliminate red eye effect and create professional photos instantly with just a click of a button.
    • Epson PhotoEnhance

      Deliver beautiful and natural photo prints by adjusting the skin tones, colour casts and exposure levels.
    • Epson Easy Photo Print

      Achieve photo lab quality prints in just 3 steps with this easy to use software.
Read More

Reset Canon Pixma MP520

How to reset waste ink pad on Canon Pixma MP520

Solution for error code 5B00:


  1. Switch the printer OFF
  2. Press buttons 1 + 2 + 3 and 4 (simultaneously using four fingers). See picture bellow
  3. Keep pressing this four buttons for 10 seconds
  4. Release the On/Off button (number 4) (Keeping pressing the others)
  5. After a few seconds (when the printer go ON) you can release buttons 1, 2, 3


    Read More

    Saturday, February 5, 2011

    Reset Counter Epson RX600, RX620 and RX630 | Free Resetter Indo

    Reset Counter Epson RX600, RX620 and RX630

    Reset Counter Epson RX600, RX620 and RX630
    Resetting RX600, RX620 and RX630 using adjustment program and manual reset. Adjustment Program RX600, RX620 and RX630 work under win98, WinME, Win 2K and Windows XP. This adjustment does not require date setting.


    Resetting Counter on Epson RX600, RX620 and RX630 Using this Adjustment Program

    • Run the software and Set the adjustment setting and equal to the printer, Click Ok
    • Click maintenante tab
    • Check waste ink pad counter then click reset to reset the counter.
    Manual resetting Epson RX600, RX620 and RX630
    • Press all following buttons : Power, B&W, Color,
    • Then, on demand (you'll see message on printer screen), turn off printer.
    Download Adjustment Program Epson RX600, RX6 2 0, RX630
    Read More